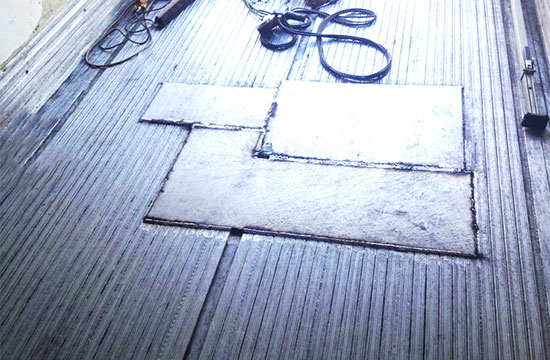
Identify the damaged areas: The first step in repairing a trailer floor is to identify the damaged areas. This can be done by inspecting the floor for cracks, holes, or soft spots. If the damage is extensive, it may be necessary to remove the entire floor.
Remove the damaged sections: If the damage is limited to specific areas, use a saw or drill to cut out the damaged sections of the floor. Be sure to wear protective gear, such as gloves and goggles, during this process.
Prepare the surface: Once the damaged sections have been removed, clean and prepare the surface for repair. This may involve removing any debris or rust, as well as sanding the area to create a smooth surface.
Install new floor sections: If you have removed specific sections of the floor, cut new sections of wood or metal to fit the area. Use screws or bolts to secure the new sections in place.
Seal the floor: Once the new sections are in place, seal the floor with a protective coating to prevent future damage. This may involve applying a sealant or painting the surface.
Test the floor: Before using the trailer, test the floor to ensure it is secure and stable. Load the trailer with a small amount of weight and drive it around to check for any signs of instability or damage.

